Is your store leaking revenue?
Find out exactly where you're losing sales — takes 2 minutes.
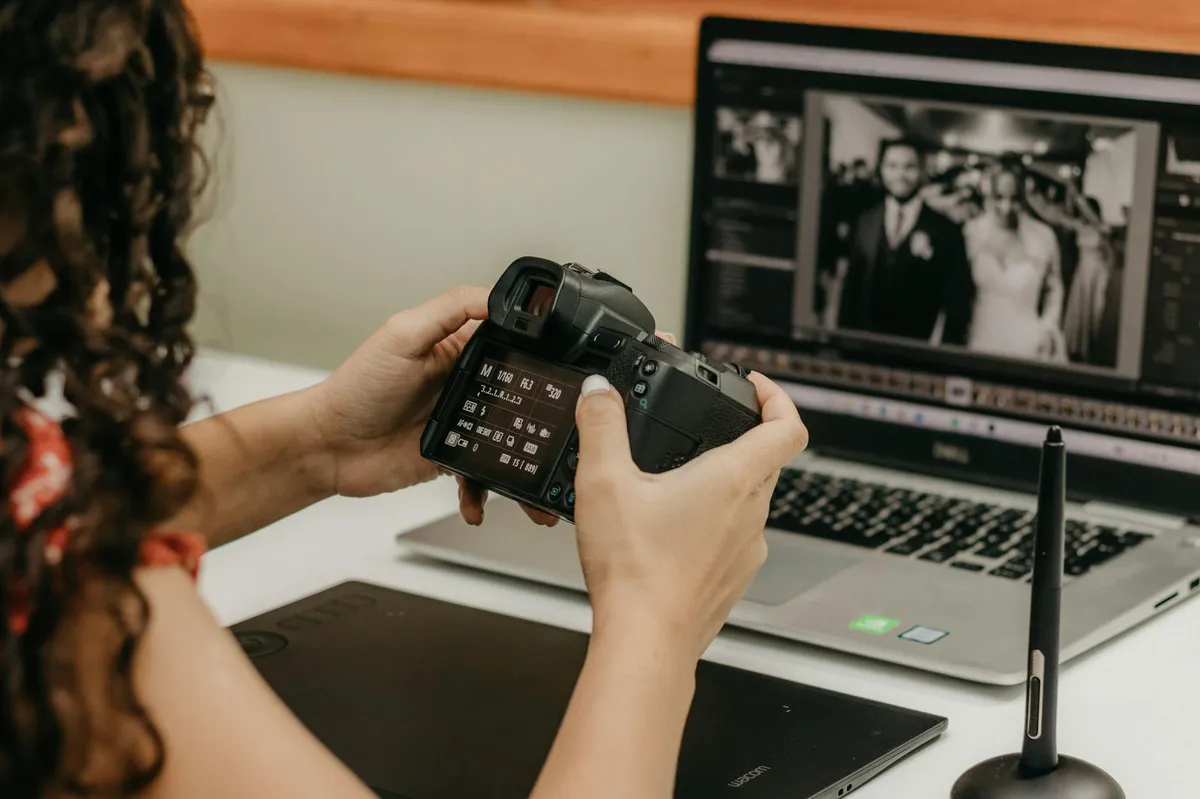
The method you choose changes your conversion rate more than the camera you use
Photos sell clothes online.
Not descriptions. Not reviews. Not price. The image is the first thing a shopper processes, and for 75% of online buyers it is the single most important factor in a purchase decision (Weebly/Square, 2024). We audit Shopify stores in Malaysia every week at WebMedic, and weak product photography is the most common conversion killer we flag — ahead of slow pages, ahead of bad copy.
The problem is not that store owners skip photography. It is that they pick the wrong method for their product type, then wonder why the images feel off.
This post breaks down the three main clothing photography methods — flat lay, ghost mannequin, and on-model — with data on what converts, what each costs, and how to execute each one without a studio.
What Is Clothing Photography and Why Does It Matter for Conversions?
Every pixel is a sales pitch.
Clothing photography is the practice of capturing garments for ecommerce listings using controlled lighting, styling, and composition to communicate fit, fabric, and quality. Stores with high-quality product images see up to 94% more views and significantly higher conversion rates compared to those with poor visuals, according to a 2023 Etsy marketplace study. It is the single highest-leverage asset on any product page.
When we optimize product pages for higher conversions, photography is always the first thing we address. Copy matters. Layout matters. But if the hero image looks like it was shot on a phone in a bedroom — none of the rest gets a chance.
Three numbers explain why:
- 75% of online shoppers rely primarily on product photos when deciding to buy (Weebly/Square)
- 22% of ecommerce returns happen because the item looked different in person (Shopify, 2025)
- Listings with multiple high-quality images convert 2-3x better than single-image listings (eBay internal data)
These are not vanity metrics. Returns eat your margin. Low conversion rates waste your ad spend. And the root cause is often the same: the customer could not see what they were buying.
Which Photography Method Works Best for Which Garment?
Pick the wrong method, and the image fights the product.
Flat lay works best for casual, patterned, and accessory-heavy outfits. Ghost mannequin is strongest for structured garments like blazers, shirts, and dresses where shape matters. On-model photography converts highest for fitted, lifestyle, or premium items. WebMedic's audit data across 40+ fashion Shopify stores shows on-model images outperform flat lays by 15-25% on conversion rate for fitted clothing — but flat lays win for accessories and casual basics.
Here is the breakdown:
| Method | Best For | Conversion Strength | Cost Per Image | Speed |
|---|---|---|---|---|
| Flat lay | T-shirts, casual wear, accessories, patterned items | Medium — shows pattern and colour well | RM 5-15 (DIY) | Fast (50-80/day) |
| Ghost mannequin | Blazers, shirts, dresses, structured garments | High — shows shape and fit without distraction | RM 15-40 | Medium (30-50/day) |
| On-model | Fitted clothing, premium lines, lifestyle brands | Highest — shows fit, movement, aspiration | RM 50-200+ | Slow (15-30/day) |
| Hanger/hook | Scarves, ties, lightweight fabrics | Low — looks cheap for most garments | RM 3-8 (DIY) | Fastest |
Sources: Pixelz pricing benchmarks (2025), WebMedic client data
The mistake we see most often: stores using flat lay for everything because it is fastest, including structured blazers and fitted dresses that lose all their shape when laid flat. The garment looks like a deflated rectangle. Customers cannot imagine wearing it.
Match the method to the garment. That one decision determines whether the image sells or confuses.
How Do You Shoot a Flat Lay That Looks Professional?
Flat lay is the easiest method to start with.
A professional flat lay requires a large flat surface, diffused overhead lighting, a camera mounted directly above the garment, and careful styling to create shape and dimension. According to Shopify's product photography guide, consistent flat lays with clean backgrounds and styled composition outperform unstructured shots by roughly 30% in click-through rate on collection pages.
Gear you need
- A flat surface at least 120cm x 120cm (a sheet of white foam board from Art Friend works)
- Two softbox lights or one large window with a diffuser
- A tripod or overhead mount (a C-stand with a horizontal arm is ideal)
- Camera or phone with manual exposure control
- Tape, pins, tissue paper for styling
The process
-
Iron or steam the garment. Wrinkles are the number one killer of flat lay quality. No amount of editing fixes a wrinkled collar.
-
Position the garment face-up. Fold sleeves at natural angles. Tuck excess fabric behind the garment to create a clean silhouette. Stuff tissue in sleeves and body to add subtle dimension.
-
Shoot from directly above. Any angle creates perspective distortion. Your lens should be parallel to the surface. Use a remote trigger or timer to avoid camera shake.
-
Light evenly. Place lights at 45-degree angles on either side. You want soft, even illumination with minimal shadows. If using a window, put a white reflector on the opposite side.
-
Leave breathing room. The garment should occupy about 70% of the frame. Too tight looks cramped. Too loose wastes space on mobile.
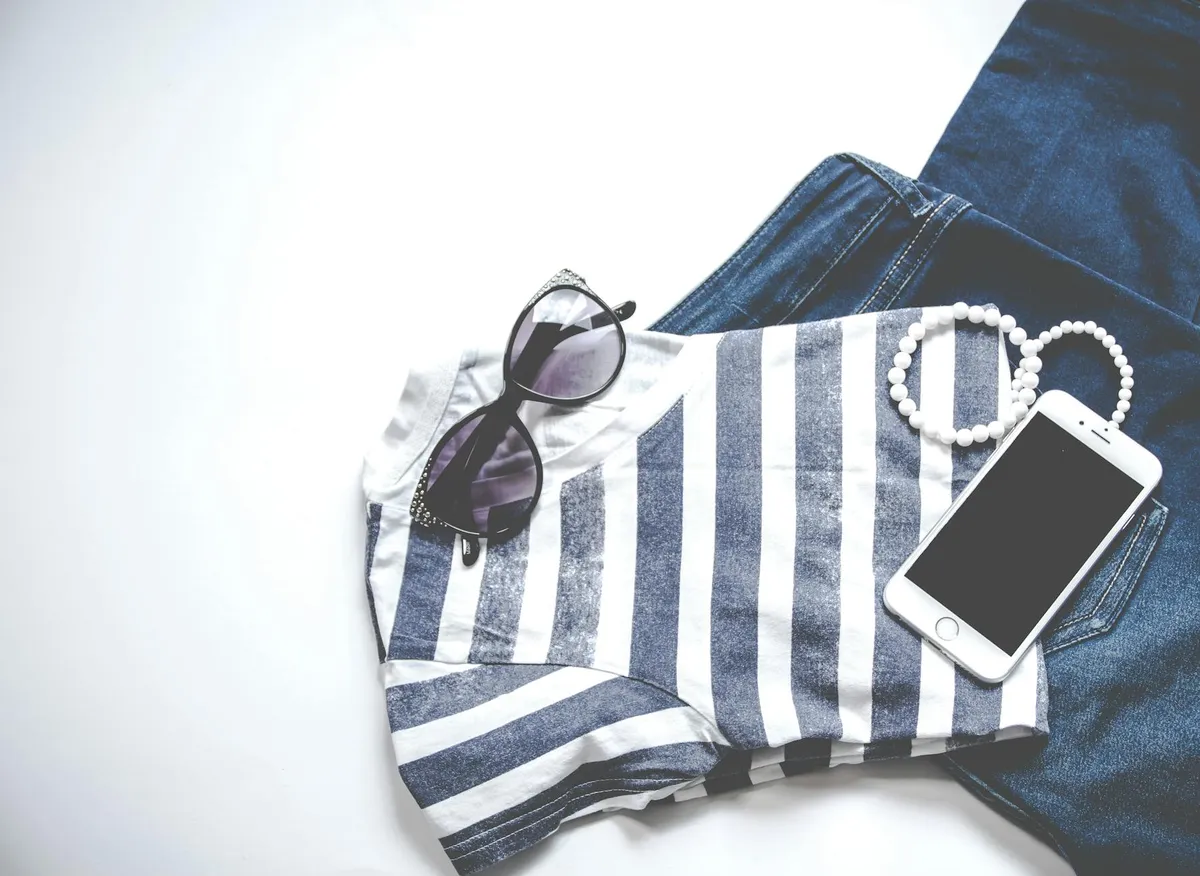
Flat lays work particularly well for accessories and outfit compositions — lay a watch next to a shirt, add sunglasses, place shoes at the bottom. This contextual styling increases average order value because the customer sees a complete look, not an isolated product.
How Does Ghost Mannequin Photography Work?
It is the industry standard for a reason.
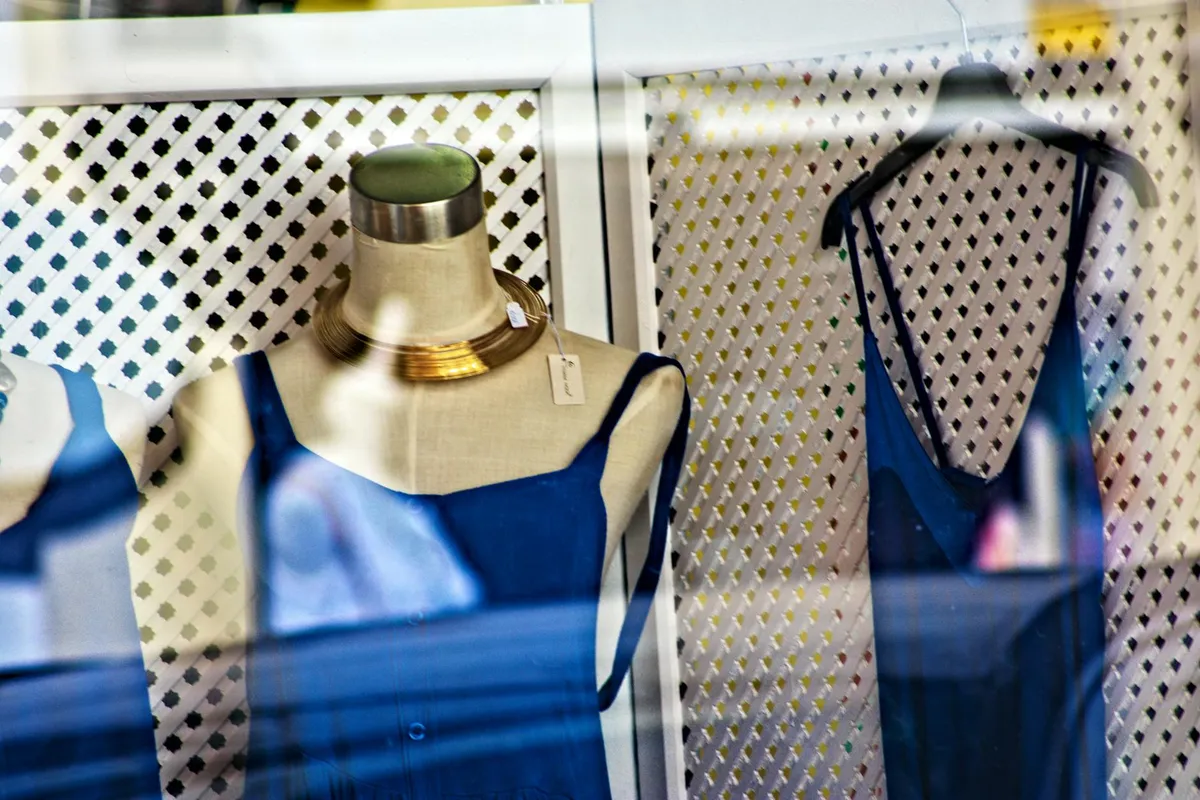
Ghost mannequin (or invisible mannequin) photography involves shooting a garment on a mannequin, then editing out the mannequin in post-production to create a hollow, 3D floating effect. This technique is used by 70-80% of professional fashion retailers including ASOS, Zalora, and H&M because it shows garment structure and fit without distracting from the product. Pixelz reports that ghost mannequin images reduce return rates by 10-15% compared to flat lays for structured garments.
What you need
- An adjustable dress form or mannequin (RM 200-800 depending on quality)
- Matching skin-tone or white mannequin for clean edges
- Two or three softbox lights
- White seamless background (paper roll or fabric)
- Photo editing software (Adobe Photoshop or free alternatives like GIMP)
The two-shot process
Shot 1: Photograph the garment on the mannequin from the front.
Shot 2: Turn the garment inside out and photograph the interior — the neck label area, inner collar, and inside hem. This is the "filler" shot.
In Photoshop:
- Cut out the mannequin from Shot 1 using the pen tool
- Layer the inside details from Shot 2 behind Shot 1
- Blend the edges so the garment appears to float
The result: a garment that shows its three-dimensional shape without any visible support. The customer sees how it would look on a body, without a distracting mannequin or model.
Common mistakes
- Cheap mannequin with wrong proportions. If the shoulders are too wide or the torso too long, the garment looks distorted. Invest in a mannequin that matches your target customer's body proportions.
- Skipping the inside shot. Without the interior layer, the neck opening looks like a hole into the void. It is the detail that makes it look real.
- Harsh lighting creating deep shadows. The goal is to show fabric texture, not create drama. Keep lighting flat and even.
Does this sound like your store? Find out where you're leaking revenue — take the free Revenue Score. 3 minutes. Free. No pitch.
Should You Invest in On-Model Photography?
If your margins support it, yes.
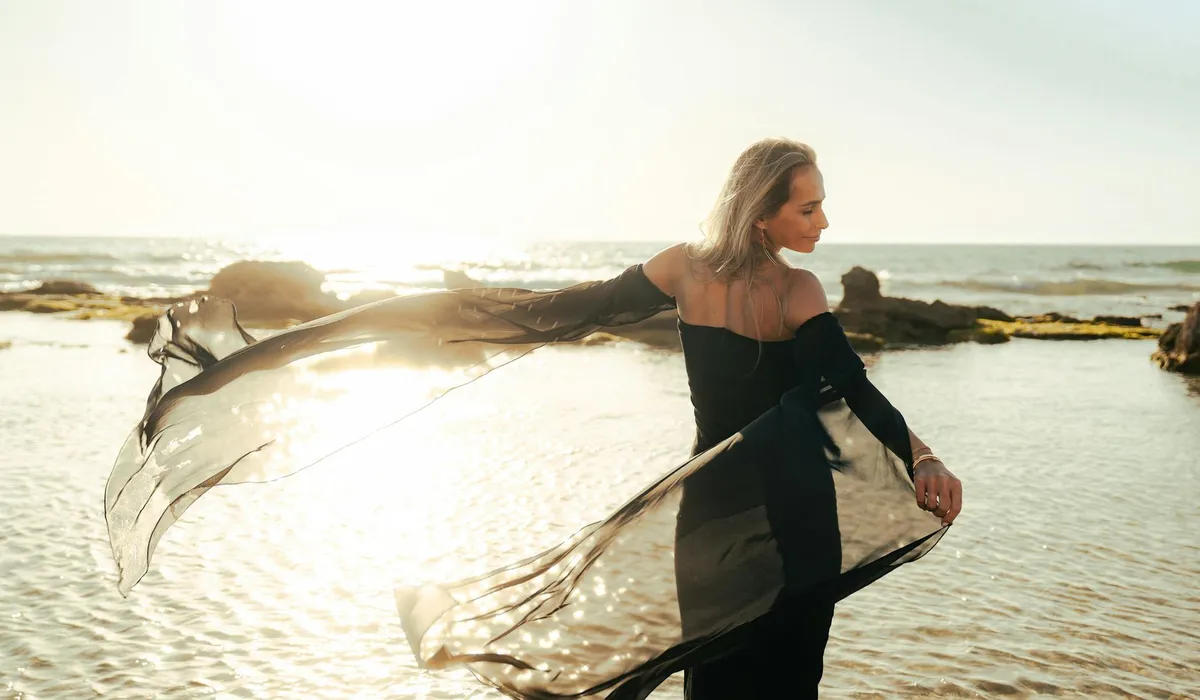
On-model photography — where real people wear and pose in your garments — consistently converts 15-30% higher than flat lay or mannequin shots for fitted and lifestyle clothing. A Shopify Plus study found that stores adding on-model images to product pages saw a 23% increase in add-to-cart rates. The cost is 3-10x higher than other methods, but the ROI is measurable for brands above RM 100 average order value.
When on-model is worth the cost
- Your products are fitted (the whole point is how they look on a body)
- Your brand has a lifestyle angle (streetwear, activewear, resort wear)
- Your average order value is above RM 100 (the conversion lift covers the cost)
- You sell to a customer who buys aspiration, not just clothing
When it is not worth it
- Basics, essentials, and commodity items (plain tees, socks, underwear) — ghost mannequin is enough
- Very early-stage stores with fewer than 50 SKUs — the budget is better spent on ads
- Fast-rotating inventory where you add 100+ new products per month — the timeline does not work
DIY model photography on a budget
You do not need a professional model. In fact, many successful Shopify brands shoot with founders, staff, or friends.
- Find consistent talent. One or two people who match your brand. Consistency matters more than beauty.
- Shoot in natural light. A large window in the morning provides soft, directional light. No studio needed.
- Use a simple background. White wall, concrete wall, or an on-location setting that matches your brand identity.
- Direct the poses. Walking, looking to the side, adjusting a sleeve. Natural movement photographs better than stiff posing.
- Shoot at chest height. Camera at the model's chest level avoids unflattering perspective distortion.
What Equipment Do You Actually Need?
Less than you think.
You can produce professional clothing photography with a modern smartphone (iPhone 15 or Samsung Galaxy S24 and above), two RM 150 softbox lights, a RM 50 tripod, a white foam board background, and free editing software. The total investment is under RM 500. According to Shopify's 2025 product photography guide, the difference between smartphone and DSLR product images is undetectable to 89% of online shoppers when lighting is controlled.
Budget gear list
| Item | Budget Option | Pro Option | Notes |
|---|---|---|---|
| Camera | Smartphone (2023+) | Sony A6400 or Canon EOS M50 | Phone is fine with good light |
| Tripod | RM 50 phone tripod | RM 300 Manfrotto with ball head | Non-negotiable — handheld = blur |
| Lighting | 2x RM 150 softbox | 2x Godox SL60W LED | Softbox kit from Shopee works |
| Background | RM 30 white foam board | RM 200 paper roll (Savage) | Replace foam board when dirty |
| Editing | Canva / GIMP (free) | Adobe Lightroom + Photoshop | Lightroom presets = consistency |
| Mannequin | — | RM 300-800 adjustable form | Only if using ghost mannequin |
| Total | Under RM 500 | RM 3,000-5,000 |
The biggest mistake is over-investing in camera gear and under-investing in lighting. A RM 5,000 camera with bad lighting produces worse images than a smartphone with two softboxes. Light is everything.
The three non-negotiables
- Consistent white balance. Set it manually. Auto white balance shifts between shots and makes your collection page look incoherent.
- Tripod. Always. Even slight hand movement creates soft images that look amateur at full zoom.
- Consistent framing. Mark your tripod position and garment position with tape. Every product image should have the same margins and centering.
How Do You Edit Clothing Photos for Ecommerce?
Editing is where amateur becomes professional.
Post-production editing for clothing photography involves background removal, colour correction, exposure balancing, and shadow cleanup. According to Clipping Path India's 2024 survey of ecommerce sellers, professional editing increases perceived product value by 30-40% and reduces return rates. The minimum edit for every image should include white background isolation, exposure correction, and colour accuracy — taking about 2-5 minutes per image with batch presets.
Essential edits for every image
- Background removal or cleanup. Pure white (#FFFFFF) backgrounds are the marketplace standard. Shopify, Amazon, and Lazada all prefer them for consistent collection pages.
- Exposure and contrast. Lift shadows, pull down highlights. The garment should look exactly as it does in person.
- Colour accuracy. This is critical. If the blue shirt looks teal on screen, you will get returns. Calibrate your monitor and shoot with a colour checker card.
- Wrinkle and dust removal. Clone stamp small imperfections. Major wrinkles should be fixed before shooting, not after.
- Consistent crop and alignment. Every image in your collection should have the same margin and garment positioning. This visual consistency signals professionalism.
Batch editing workflow
- Edit one image perfectly — this is your reference
- Save those adjustments as a Lightroom preset or Photoshop action
- Apply the preset to all images from the same shoot
- Fine-tune individual images only where needed (colour shifts, exposure variations)
This workflow cuts editing time by 70-80% and ensures consistency across hundreds of SKUs.
How Many Product Images Do You Need Per Listing?
More than you currently have.
The optimal number of product images for a clothing listing is 5-8, covering front, back, detail, lifestyle/context, and size reference angles. Shopify's internal data shows that listings with 5+ images convert 58% higher than single-image listings. WebMedic's data across Malaysian fashion stores confirms that moving from 3 to 6 images per product increases add-to-cart rate by 18-22% on average.
The minimum image set for clothing
- Front view — the hero shot (flat lay, mannequin, or model)
- Back view — customers want to see the full garment
- Detail close-up — fabric texture, stitching, buttons, labels
- Scale or size reference — the garment being worn or held, showing proportions
- Lifestyle/context — styled with other items or in a real setting
For fitted clothing, add a side view and a movement shot (model walking, fabric flowing). For patterned items, add a pattern close-up at 100% crop.
What good product descriptions and photography have in common
They both answer the same customer questions: What does it look like? How does it fit? What is the quality like? What does it feel like?
Your copy handles "feel" and "why." Your images handle "look," "fit," and "quality." When both are strong, the customer has no reason to hesitate.
What Are the Biggest Clothing Photography Mistakes?
Avoid these and you are already ahead of 80% of stores.
The most damaging clothing photography mistakes are inconsistent lighting across product listings, uncorrected colour (causing 22% of ecommerce returns according to Shopify), wrinkled garments, and using a single image per listing. WebMedic's audits find that 6 out of 10 fashion Shopify stores have at least two of these issues on their product pages.
The top mistakes ranked by conversion impact
-
Inconsistent image style across the catalogue. Some products shot on white, some on grey, some on a bed. The collection page looks like a flea market.
-
Wrong method for the garment type. Flat lay for a structured blazer. On-model for a basic white tee. Match the method to the product.
-
Colour inaccuracy. The number one driver of clothing returns. If the customer receives something that looks different from the photo, you lose the sale and pay for shipping twice.
-
Single image per product. You are asking the customer to spend money on something they cannot fully see. That is a trust problem.
-
Ignoring mobile. Over 70% of Shopify traffic is mobile. If your detail shots do not hold up on a 6-inch screen, they are not working.
-
Over-editing. Heavy filters, artificial contrast, skin smoothing on model shots. It looks good on Instagram. It causes returns on Shopify because the product arrives looking different.
Frequently Asked Questions
What are the best clothing photography tips for beginners?
Start with flat lay photography using a smartphone, two affordable softbox lights (under RM 150 each), and a white foam board background. Focus on consistent lighting and ironed garments before investing in advanced techniques. Shopify's 2025 guide confirms that smartphone images with proper lighting are indistinguishable from DSLR shots for 89% of online shoppers.
How much does clothing photography cost in Malaysia?
DIY clothing photography costs under RM 500 for initial setup (tripod, lights, background) and RM 5-15 per image in time. Professional product photography services in Malaysia range from RM 15-50 per image for ghost mannequin and RM 50-200+ per image for on-model shoots. Most Shopify stores break even on professional photography within 60 days through improved conversion rates.
Is flat lay or mannequin photography better for Shopify?
Ghost mannequin photography outperforms flat lay for structured garments like blazers, shirts, and dresses by showing three-dimensional shape and fit. Flat lay performs equally well or better for casual items, patterned fabrics, and accessories. WebMedic's data shows ghost mannequin images reduce return rates by 10-15% for structured clothing compared to flat lays.
How many product photos should a clothing listing have?
The optimal range is 5-8 images per clothing product: front, back, detail close-up, size reference, and lifestyle/context shots. Shopify internal data shows listings with 5+ images convert 58% higher than single-image listings. For fitted clothing, add side views and movement shots to give the customer full confidence in fit.
Can I use a phone for professional clothing photography?
Yes. Modern smartphones from 2023 onward (iPhone 15, Samsung Galaxy S24, Pixel 8) produce images that are functionally indistinguishable from entry-level DSLRs when lighting is controlled. The key is using a tripod, manual exposure settings, and consistent two-light softbox setup. Most Shopify stores under RM 2M revenue use smartphone photography successfully.
Keep Reading
Free Download
23 things your top competitor's store has that yours doesn't.
"I look at their store and it just looks better. We get the traffic — something's clearly off." Here are the 23 specific things they're doing.
Benchmarked across 20+ Shopify stores in beauty, fashion, food & beverage. Half the gaps close in under a week.
PDF in your inbox in 30 seconds. 1 email. No follow-up unless you ask.